Facebook boasts over 300 million users in India, offering a great opportunity for real estate agents to reach vast and diverse leads. If you want to generate leads for your real estate services on Facebook quickly, you can do so with the help of Facebook Lead Ads.
In this article we discuss everything you need to know about running Facebook Lead Ads for the best results. Follow along if you’re looking to leverage Facebook Lead Ads to generate leads for your real estate listings.
What is Facebook Lead Ads?
Facebook Lead Ads is a type of paid promotion specifically designed to help you collect information from potential clients directly through your ads, and without them needing to leave the platform. This process makes it easier for you to connect with people who are genuinely interested in your properties.
With Facebook Lead Ads, you can use pre-filled, customisable forms to gather the details you need to follow up with a prospect. As a real estate agent, you can easily gather contact information from prospective buyers, sellers, or renters directly from Facebook Lead Ads.
Here are some benefits of Facebook Lead Ads:
- Ease of use: The forms are pre-filled with users’ information from Facebook. This reduces the friction and makes it easier for people to complete the form.
- Cost-effective: Facebook Lead Ads often cost less per lead compared to traditional advertising methods.
- Integrations: Facebook leads can be directly integrated with and sent to your CRM or sales automation tools. This streamlines your sales process, helping you improve your chances of converting leads.
Facebook Lead Ads come with many exciting features that you can benefit from as a real estate agent. Some are as follows:
- Customisable forms: You can customise lead forms to ensure you only ask relevant questions. This can help you understand your lead’s intention and qualify them before you reach out to them.
- Lookalike audiences: This feature allows you to find people that match your potential or ideal customers.
- Retargeting: You can re-engage people who have previously shown interest in your business, such as people who have visited your website in the past or interacted with your previous ads.
- Instant forms: Facebook Lead Ads forms load instantly and ensure a seamless experience for users. This experience can increase the likelihood of form completion.
Things you need to publish Facebook Lead Ads
While the process of publishing Leds Ads on Facebook is pretty simple, you need a few things in place in order to be able to do so. This mainly includes having a Facebook Business Page and a privacy policy.
Facebook Business Page
A Business Page represents the social presence of your business on Facebook. It allows you to engage with customers and share information and updates whenever you want.
You need a Business Page to run ads on Facebook. But running ads shouldn’t be your only purpose for creating a business page on Facebook. It’s a great tool to connect with your potential customers and grow a following that could in turn become customers.
If you don’t already have a Facebook Business Page, creating one is pretty straightforward. Here’s a step-by-step guide:
On desktop:
- Log in to Facebook.
- Click on Pages (located on the left side of your screen).
- Click on Create a new Page.
- Enter your preferred Page name and select a category for your business.
- Click Create Page.
You can customise your page later by adding your Bio, a profile picture, and a cover photo.
On mobile:
- Open the Facebook app.
- Tap your profile picture to open Menu.
- Tap Pages.
- Tap Create.
- Enter your preferred Page name, and tap Next.
- Select the business category.
- Tap Create.
After creating your Business Page, you can complete it by entering your bio, contact information, location, and business hours. You can also further customise it later by adding a profile picture and a cover photo.
Privacy Policy
Having a privacy policy is mandatory if you want to collect people’s personal information online. A privacy policy is a legal document that informs users how a business collects and uses their personal data. You don’t need a privacy policy to run your Facebook Business Page but you do need it to run Facebook Lead Ads where you’ll be capturing people’s contact details.
While creating your Lead Ad on Facebook, you’ll be asked to enter the link to your privacy policy in the final step. This means your privacy policy should have its own page hosted on the internet. (We’ll cover the steps to creating Facebook Lead Ads in the next section.)
This may sound confusing but don’t worry! Creating a privacy policy is fairly simple, and you don’t necessarily need a website to have a URL to your privacy policy. Keep in mind that you’ll need this document for many online activities in the future, so do refer to our guide on how to create a privacy policy you can keep reusing.
There are privacy policy generators tools to help you create your own privacy policy. Visit Privyr’s Free Privacy Policy Generator Tool if you’re looking to create your own privacy policy and its URL.
If you want to know more, here’s everything you need to know about privacy policy, including when and where you need it, and how to create your own in seconds.
How to publish Facebook Lead Ads
Now that you have everything you need in place, it’s time to create your Lead Ad on Facebook. Facebook Ads Manager is your central hub for managing and creating ads on Facebook. It’s a powerful tool that helps you customise your ads the way you want. You can target specific demographics, set budget limitations, and choose when and where you want your ads to appear.
Keep in mind that you can post your Lead Ads using two different tools: Ads Manager and Meta Business Suite. The process of publishing ads in both cases are pretty similar.
Here’s how to publish your Facebook Lead Ads with Ads Manager:
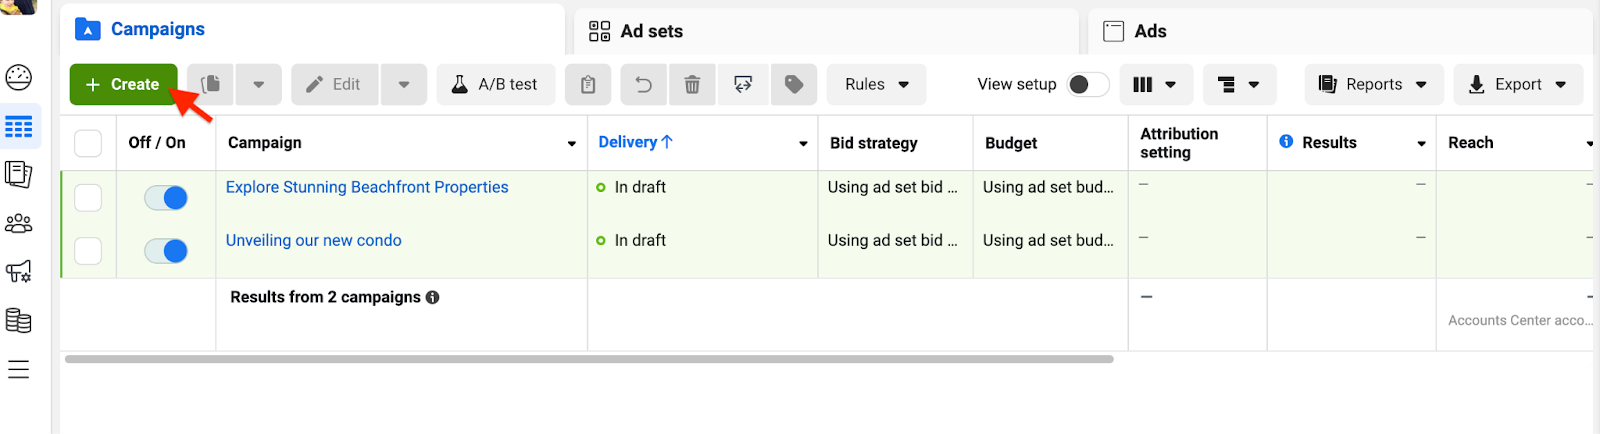
Step 1. Go to your Ads Manager and click + Create to start a new ad.
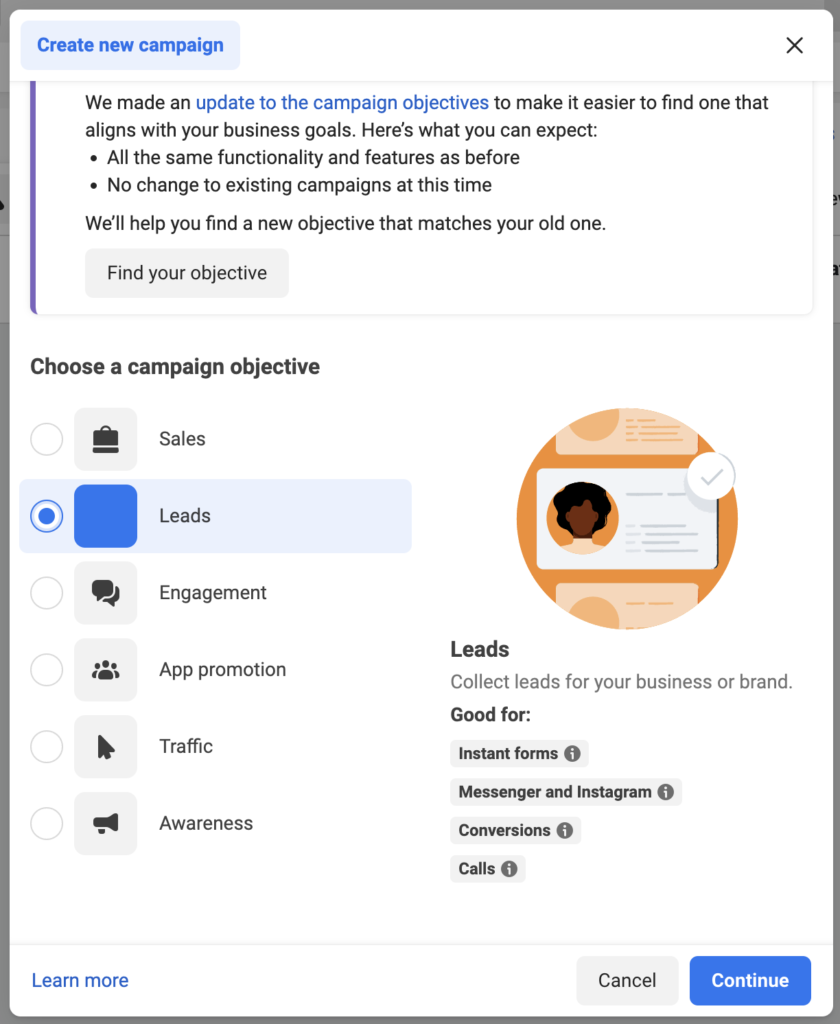
Step 2. You’ll see a new window with six different campaign objectives. Choose ‘Leads‘ as your objective.
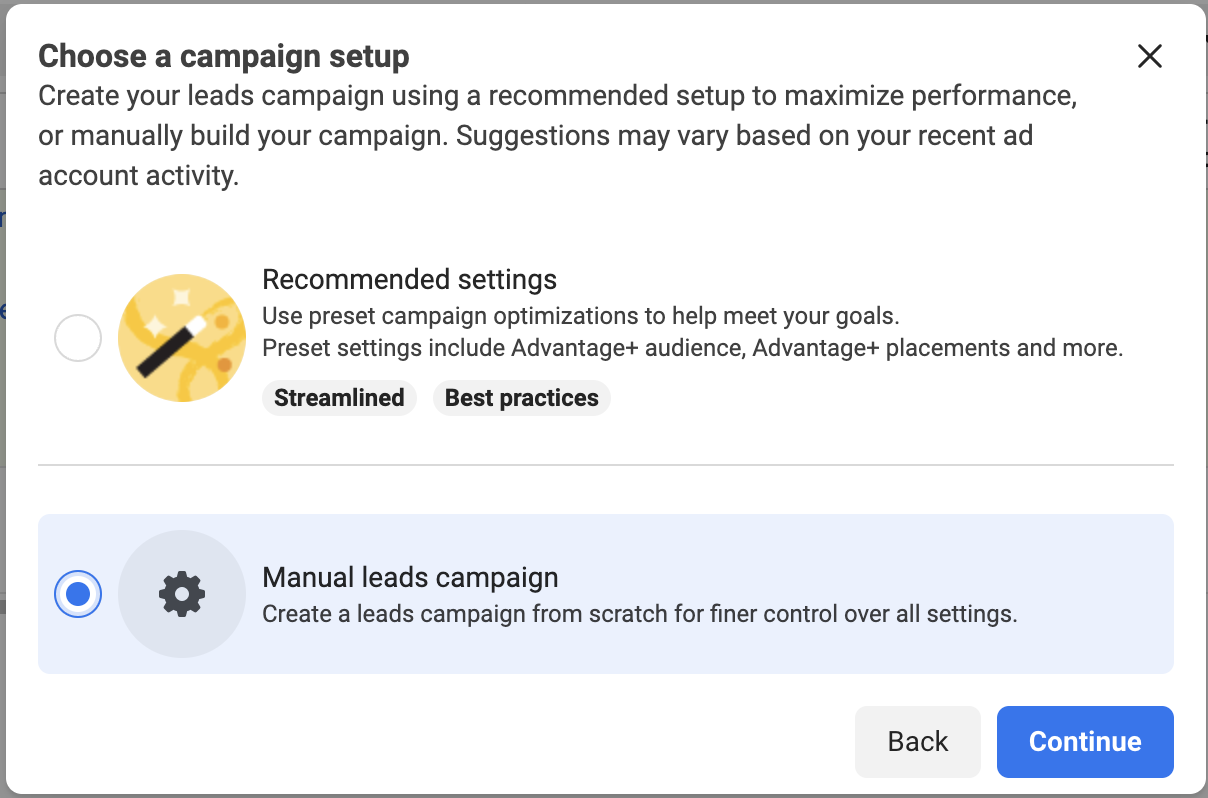
Step 3. You’ll see a new window with two options: Recommended Settings and Manual leads campaign. The recommended setting is a streamlined version that allows you to create and publish your Lead Ads quickly. However we recommend you to choose Manual Leads Campaign since you have more freedom to customise your ads. And it’s quite straightforward.
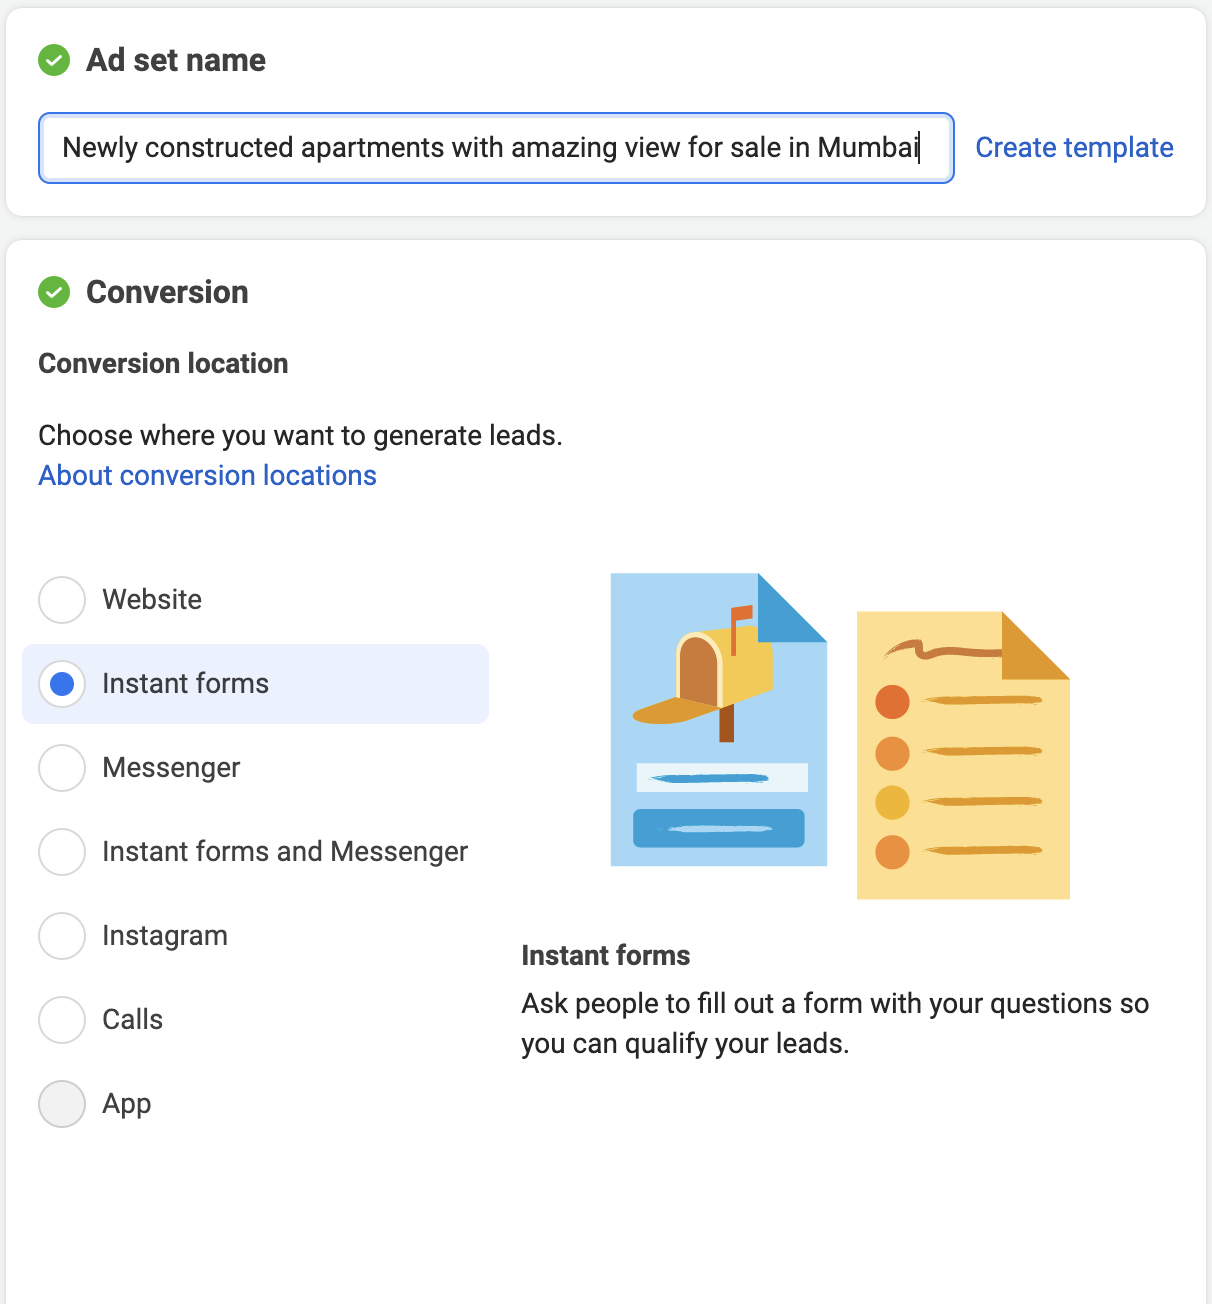
Step 4. Now it’s time to name your ad set and add a conversion location. Consider putting a unique name so you can easily keep track of your ads later. Just below the Ad set name, you’ll see the conversion location. Make sure you select Instant Forms.
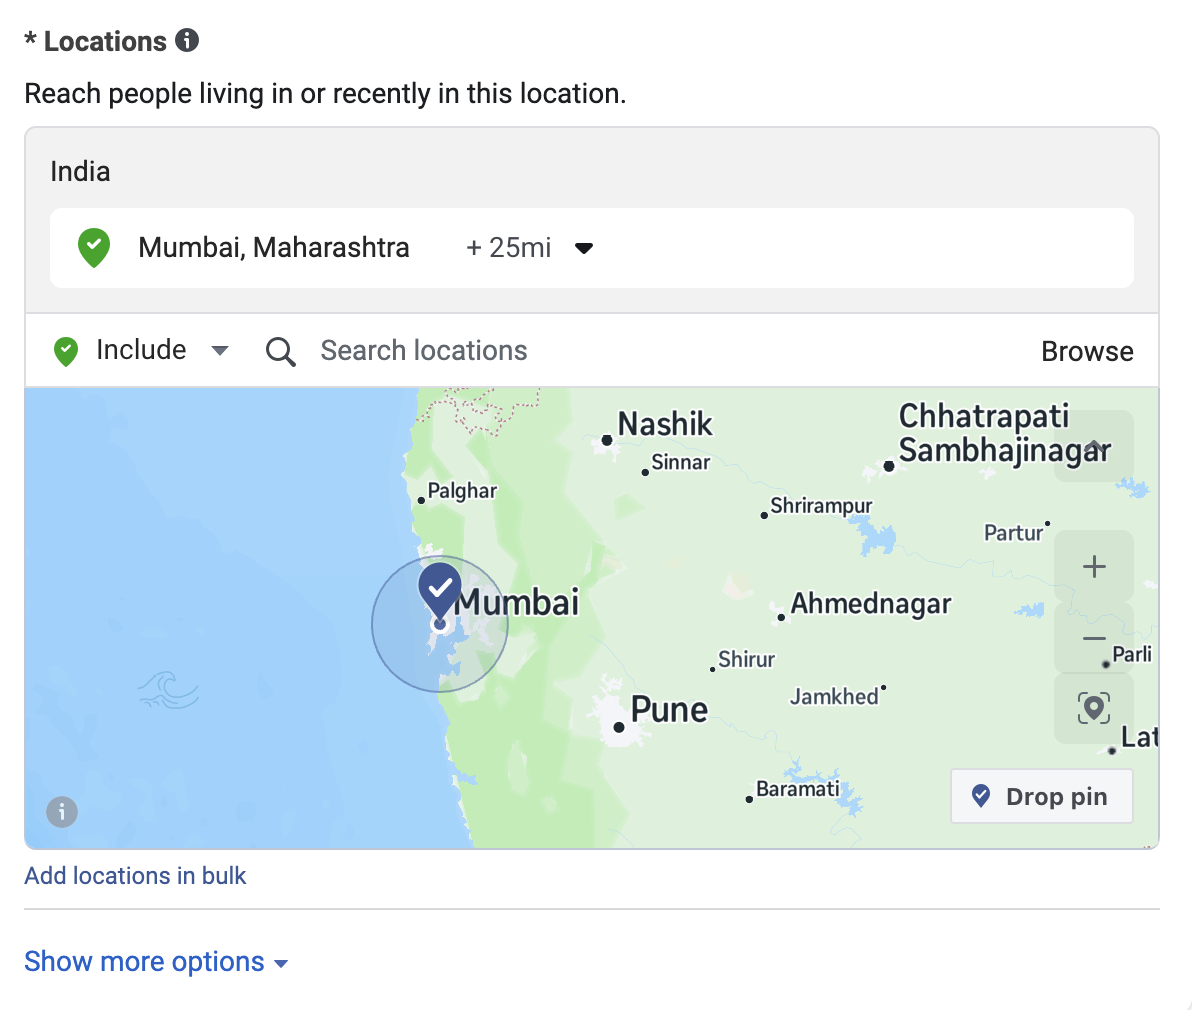
Step 3. Scroll down to set your budget, audience, placement, and schedule. Turn on Advantage Campaign Budget and select a Daily Budget for your campaign. Then, choose the location you want to display your ad to.
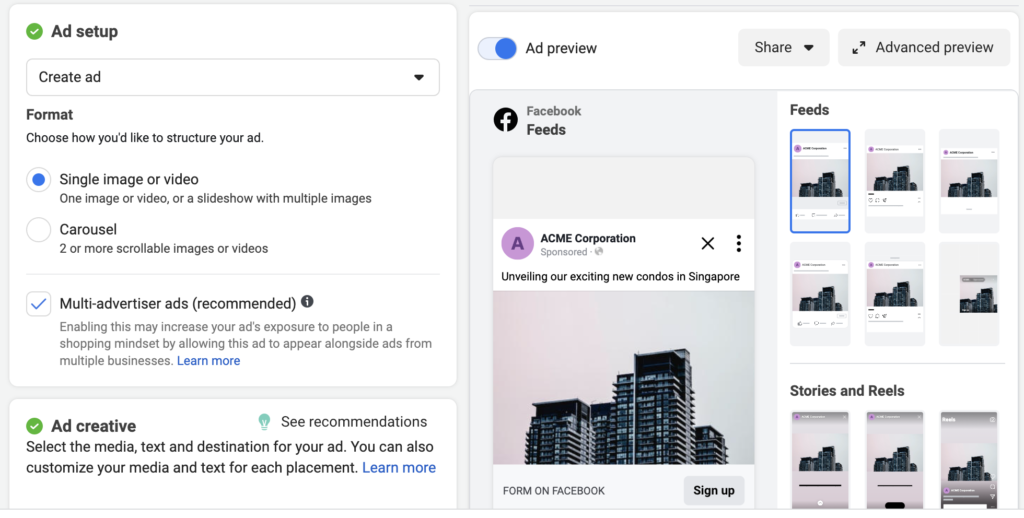
Step 4. In this step, you’ll create your ad. You can choose what type of ad you prefer running, such as image, video, or carousel.
If you decide to go for an image-based advertisement, you can choose between three different size options and even crop the image as you please. After uploading your ad image, enter your headline and caption. Description is optional but highly recommended that you write a good one to draw attention or drive action.
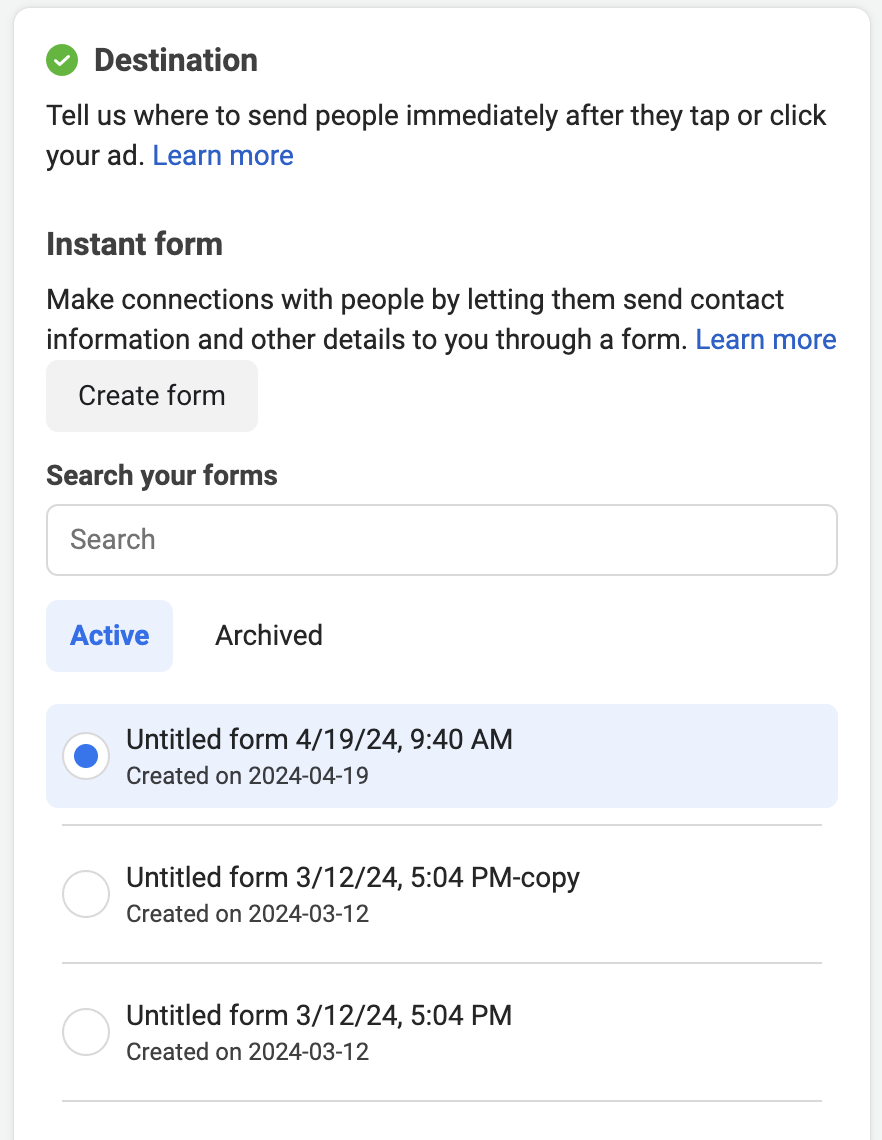
Step 5. Build your form and add your privacy policy URL. Select Create Form or select an existing form from the list (if you have an existing form that you want to use).
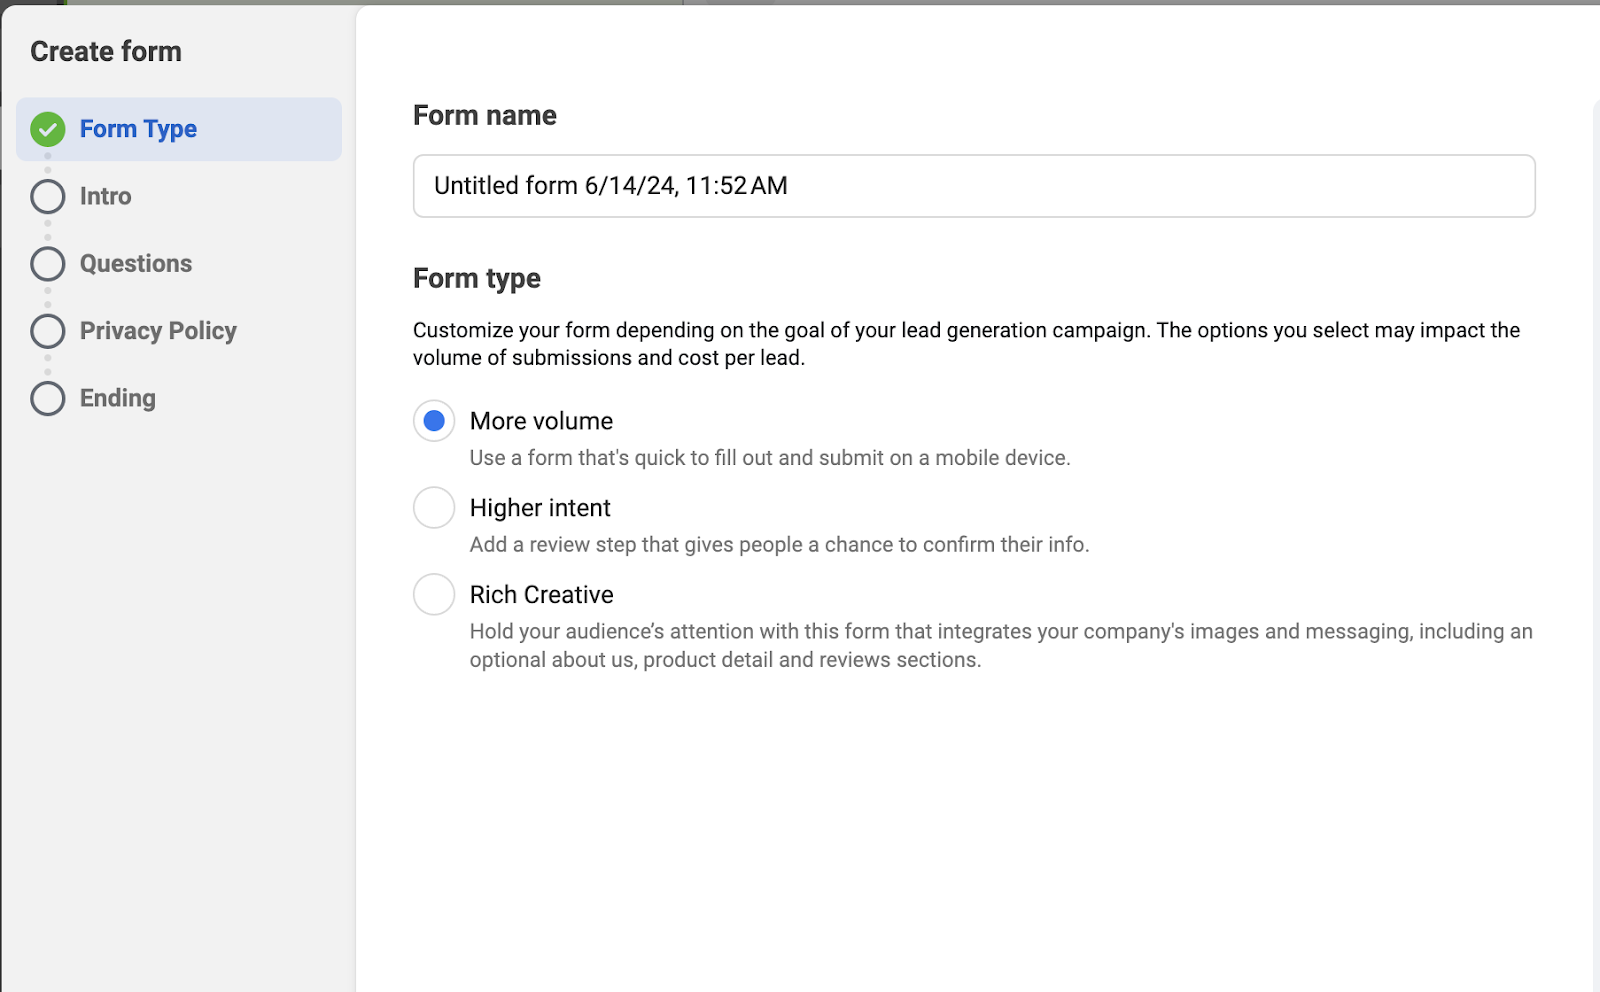
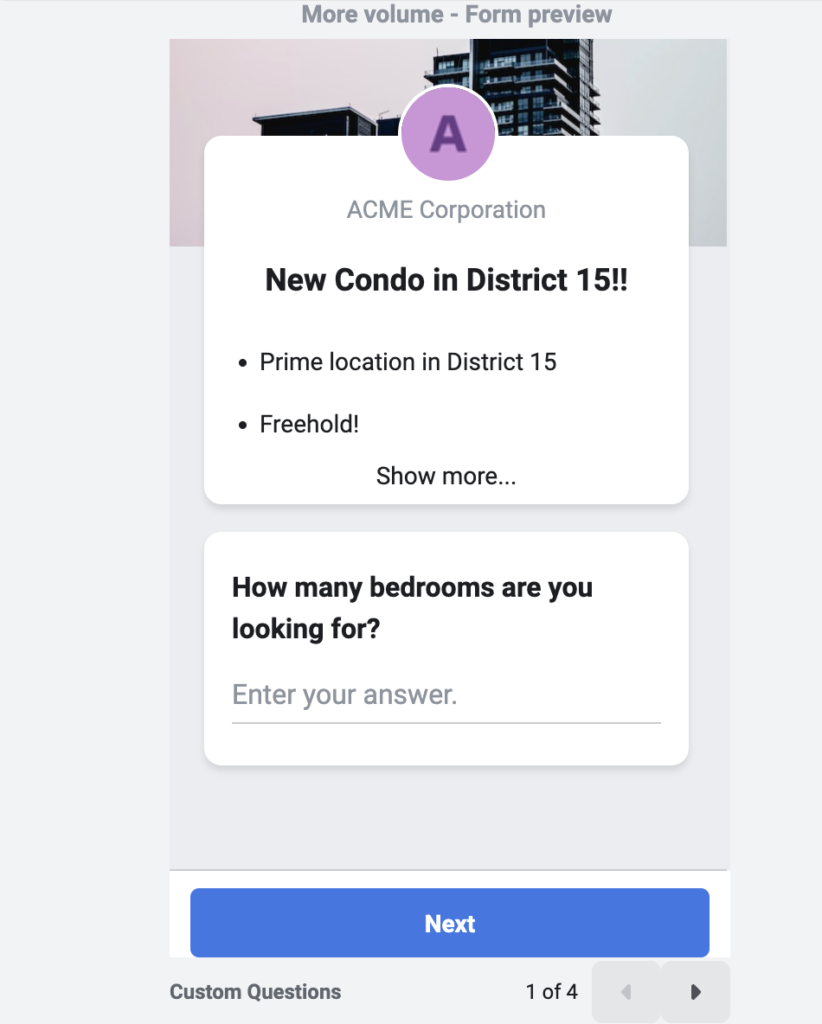
Once you select Create Form, you’ll see a new window to build your form. Name your form and add the fields as you prefer. You’ll have the option to choose between More Volume, Higher Intent, and Rich Creative. The More Volume option makes it easy for visitors to fill out and submit the form quickly and the Higher Intent filters out unlikely leads. Similarly, Rich Creative can be a great choice to generate highly targeted quality leads through an attention-grabbing form.
Add your intro, questions, and paste your privacy policy URL in the privacy policy section.
In the final step, preview your lead form.
Step 6. This is the final step where you’ll review everything and click the Publish button.
Once you click Publish, Facebook will review and approve your ad before it goes live. The review process shouldn’t take long. However, your ad could be denied in some rare instances, which isn’t a big deal. You can review Facebook’s policy and fix the issue with your ad and publish again.
How to download your Facebook leads
Facebook stores all the information generated from your Lead Ads in Facebook Ads Manager. You can manually download your leads from Ads Manager on your desktop.
Here’s how to do it:
- Log in to your Facebook account from a laptop or desktop browser.
- Go to Ads Manager and click on the Ads tab (next to the Campaign and Ad Sets tabs).
- In the results column of the ad you wish to check, click on ‘Facebook Leads’.
- Click on ‘Download New Leads’ or ‘Download by Date Range’.
- You will see the form name along with the number of leads. Click CSV or XLS to download your lead data.
Final words
Facebook Lead Ads is an excellent tool for generating leads for your real estate business. However, generating leads isn’t your only goal. Your campaign will be considered successful only if you manage to connect with the right people effectively and close deals. Therefore, it’s crucial to carefully handle the next steps after successfully capturing a lead.
Manually accessing and transferring your Facebook leads to your phone or CRM can be really inefficient. You’ll need to visit the Ads Manager multiple times just to update your leads sheet. This can result in delayed outreach, and in worst cases, missed leads or sales opportunities because a competitor closed in before you did. You don’t want that after investing so much time, effort, and money running Lead Ads.
A CRM can easily solve the issue of inefficient sales processes. The right CRM integrates with your Facebook Ads Manager, automatically imports lead data, and streamlines your sales process, saving you a lot of time and effort.
Privyr is an excellent tool to run your sales process from your smartphone or desktop. It automatically imports your new Facebook Leads to your phone in real time, allowing you to connect with them immediately on popular messaging apps like WhatsApp, SMS, iMessage, and more – all within seconds. This is great for getting the conversation started and moving leads further down your real estate sales funnel.


")
